
මේ පොස්ට් එකේ විස්තර කරන්නේ mysql database එකක් එක්ක php වලින් වැඩ කරන්නේ කොහොමද කියලා. කලින් mysql database එකක් එක්ක java වලින් connect වෙන විදිය ලියපු පොස්ට් 1 2 මෙතනින් බලන්න. දැන් බලමු මේ වැඩේ php වලින් කරන්නේ කොහොමද කියලා.
මුලින්ම php code කරන්න source file එක හදාගන්න ඕන.
[code language=”php”]
<!DOCTYPE html>
<html>
<head>
<title>PHP – MYSQL</title>
</head>
<body>
<?php
//Enter your php code here
?>
</body>
</html>
[/code]
මේ තියෙන්නේ basic structure එක php file එකක. අපි අපේ code එක ගහන්නේ මේ comment කරලා තියන area එකේ. මේක කරන්න කලින් database එක සහ table එක හදලා තියෙන්න ඕන. sample data ටිකකුත් තිබුනොත් වැඩේ කරන්න ලේසි වෙයි.
[code language=”php”]
$username = "root";
$password = "1919";
$hostname = "localhost";
[/code]
මෙතන $username, $password විදියට mysql server එකේ username එක, password එක දෙන්න. $hostname එක localhost විදියට තියන්න. දැන් කරන්න ඕන connection එක success උනාද කියලා බලන එක. connection එක fail නම් error එකක් දෙන්නත් පුළුවන්.
[code language=”php”]
$dbhandle = mysql_connect($hostname, $username, $password);
if(!$dbhandle){
die("Unable to connect to MySQL");
}else{
echo "Job Done!";
}
[/code]
දැන් php file එක මේ වගේ තියෙන්නේ. දැන් මේ file එක apache server එකේ දාලා run කරගන්න. wamp use කරනවා නම් C: එකේ www folder එකේ අලුතෙන් folder එකක් හදලා save කරගන්න. xampp නම් C:/xampp/htdocs/ එකේ folder එක හදලා save කරගන්න. file name එක index.php විදියට දෙන්න.
දැන් web browser එකේ localhost/folderName කියලා type කරලා enter කරන්න. screen එකේ Job Done! message එක එනවා වැඩේ හරි නම්.
දැන් database එකට data දාන විදිය බලමු. මුලින්ම database එක specify කරන්න ඕන මේ විදියට. error එකක් ආවොත් die() function එක execute වෙන්නේ.
[code language=”php”]
$selected = mysql_select_db("mydb",$dbhandle) or die("Could not select database!");
[/code]
දැන් data දාන part එක තියෙන්නේ. මේකෙදි mysql_query() function එක use කරන්නේ. මේ තියෙන්නේ code එක. (මෙතැනදී මම හදපු db table එකට ග;ගැලපෙන විදියට data දාල තියෙන්නේ, use කරන db table එකට ගැලපෙන්න code line එක වෙනස් කරගන්න.)
[code language=”php”]
$sql = "INSERT INTO student(fname,lname) VALUES (‘John’,’Diggle’);";
mysql_query($sql);
[/code]
database එකට ගිහින් බලන්නඅලුත් data එක add වෙලාද කියලා.
දැන් බලමු database එකේ data retrieve කරගන්නේ කොහොමද කියලා. මේකෙදි mysql_fetch_array() function එක use කරන්නේ. මේ තියෙන්නේ code එක. මේක හදපු database table එක අනුව වෙනස් කරගන්න.
[code language=”php”]
$result = mysql_query("SELECT * FROM student");
while ($row = mysql_fetch_array($result)) {
echo "<br>ID: ".$row{‘id’}." First Name: ".$row{‘fname’}." Last Name: ". $row{‘lname’};
[/code]
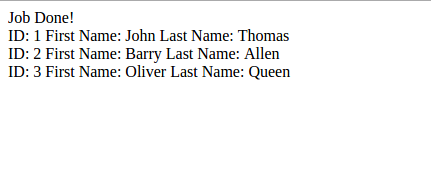
මෙතන id, fname, lname කියන්නේ මගේ db table එකේ columns. දැන් file එකේ run කරාම. වැඩේ හරි ගිහින් නම් result view වෙනවා මේ විදියට.
මේ තියෙන්නේ full code එක.
[code language=”php”]
<!DOCTYPE html>
<html>
<head>
<title>PHP – MYSQL</title>
</head>
<body>
<?php
$username = "root";
$password = "1919";
$hostname = "localhost";
$dbhandle = mysql_connect($hostname, $username, $password);
if(!$dbhandle){
die("Unable to connect to MySQL");
}else{
echo "Job Done!";
}
$selected = mysql_select_db("mydb",$dbhandle) or die("Could not select database!");
$sql = "INSERT INTO student(fname,lname) VALUES (‘John’,’Diggle’);";
mysql_query($sql);
$result = mysql_query("SELECT * FROM student");
while ($row = mysql_fetch_array($result)) {
echo "<br>ID: ".$row{‘id’}." First Name: ".$row{‘fname’}." Last Name:".$row{‘lname’};
}
?>
</body>
</html>
[/code]
video එක බලන්න පුළුවන් මෙතනින්.
http://www.youtube.com/watch?v=FrDKSeWGmZU
පැහැදිලි නැති තැනක් තියනවා නම් comment එකක් දාන්න.

චරිත සම්පත් ගුණවර්ධන
Good work (Y)
dhanush_c
thanks 🙂
Connect to a MySQL Database Using PHP (+ video) | සතුටු වැස්ස බ්ලොග් කියවනය
[…] Connect to a MySQL Database Using PHP (+ video) […]
Lasith Niroshan
keep it up man………(Y)
dhanush_c
Thanks bro..
Sujan Dexter Jayasinghe
Great Work! Keep it up!
dhanush_c
Thanks brother.. 🙂
Binura Knight Dodangoda
Great !!! 😀
dhanush_c
Thanks 😀
Chamara Liyanage
Awesome machan very helpful keep it up bro ! Cheers
dhanush_c
Thanks bro… let’s do that
Chathuranga Sandun Kumara
suppa bn. Keep it up dhananushka……….
How to Connect to the MySQL Database in PHP – Advanced Tutorial | dhanushka's blog
[…] use කරන විදිය ගැන කතා කරානේ.. ඒ පොස්ට් එක මෙතනින් බලන්න පුළුවන්. දැන් මේ කියන්න යන්නේ ඊට […]
rajithst
thank you so much aiya..this is great
dhanush_c
😀